อันนี้เป็นการสร้าง class Car syntax อาจจะงงๆบ้าง ช่างมันก่อน เอาเป็นว่ามันสร้าง class Car โดยมี constructor รับ parameter มาก็ปริ้นมาดูง่ายๆ
เสร็จแล้วไปแก้ main.js ของเราให้เป็นแบบนี้
1
2
3
varCar=require('./car');letcarObj=newCar("red");
จะเป็นการสร้าง import module car ที่เราสร้างไว้มาเก็บไว้ โดย var Car ในที่นี้จะแทนตัว class Car ส่วน carObj จะเป็นการสร้าง object Car จริงๆขึ้นมาโดยในที่นี้เราใส่ constructor parameter ไปว่า ‘red’
ลองไปรัน main.js ด้วยคำสั่ง node main.js มันน่าจะปริ้นคำว่า red นะ
This post is about using slick carousel https://github.com/akiran/react-slick
with Meteor React framework. It also can apply with other React component that relies on CommonJS.
I’m learning meteor framework with react.js and trying to put a carousel to my website. I decide to go with slick carousel http://kenwheeler.github.io/slick/ react port which seems easy to use.
Problem is react-slick component made an assumption that we’ll use CommonJS module, like this:
which make sense because the carousel comes before meteor see the world.
So, in order to make use or existing react component that relies on CommonJS, I need to add this meteor package : meteor add cosmos:browserify
this browserify will make the require('modulename') things work on client side.
the require is a module loader command which originally is made for node.js server side. Browserify will make this command works on client side
Let’s create a file name /lib/app.browserify.js – the browserify.js suffix is required. Then put this code in it.
//app.browserify.js//we do not required 'react' here because we will use meteor versionSlider=require('react-slick');
This will make Slider available in global scope so you can use it in your react component.
I'm not sure if lib is a right place to put the browserify file because lib is shared to both server and client whereas browserify is meant to be used for client only. I might move it later
But we don’t have react-slick module yet
Now that we have browserfiy ready in Meteor side, let’s start making use of node package by first adding meteor add meteorhacks:npm and then npm install react-slick. This should list a react-slick module (that we require in previous step) in your package.json.
If you run npm list now, You’ll see react-slick as well as react in its dependency.
Now go to your browser and run your code, hopefully there will not be an error like ReferenceError: require is not defined because we already add browserify package.
What you will get is an error : you have multiple copies of React loaded. This is because we already have react package in meteor and it conflicts with npm react that is in dependency or react-slick.
You have multiple copies of React loaded
To solve this, we need to use npm package externalify. Go run npm install externalify in your console. Once it is installed, create a file called /lib/app.browserify.options.json and put this config in it
This is a browserify transformer which will transfer ‘react’ and ‘react-dom’ require to use meteor’s react version. This will solve you have multiple copies of React loaded error.
Go back to browser and run your code, it should work now but not so nice.
Adding stylesheet for slick carousel
You will need one more component in order to make it work. It’s a stylesheet. To install it, the author suggest us to use bower. Meteor also has a bower package so let’s add it meteor add mquandalle:bower once you install it. create a file .bowerrc in your root folder and put below code it in. This will enable bower command in your command line.
{"directory":".meteor/local/bower"}
Now run bower init to create a bower.json file. You can spam enter to use default value. After that, bower install --save slick-carousel to install slick-carousel stylesheet. It will be list in bower dependency as well so that other dev can install it.
You’ll need git in your PATH in order to install slick-carousel
THAT’S IT.
Hopefully, your slick carousel should work now. It seems tiredsome for just a carousel but browserify, npm and bower are actually a common tool and can be used for other package/component that you might need in future.
In my previous post, I wrote about how to use passport authentication with Basic Strategy. One thing that bugged me was I cannot return a result right from passport callback.
Below is the code from my previous post.
You can see that after we authenticate user, we proceed to the function(req,res){ block. In this block, we have to query information for user again which is redundant work.
We can avoid this by using Passport custom callback as below
With this, we can authenticate user and return the result to respond at the same time.
However, this might not be your desired behavior for Passport Strategy because it’s against Single responsibility principle.
In the end, it’s up to you to decide which one suits you most.
Until next time!
I’m embarrassed to admit this but I’ve spent many hours to make this work
I’m still with node.js but not Dr.Dave this time. I’m working with my friend on a new idea of mobile application and I’m responsible for backend side.
My friend let me choose backend technology and obviously I chose Node.js (just for learning purpose). Anyways, since this is a mobile app, I don’t really care much about view rendering so screw jade and ejs!
I searched for Node REST API stuff and ended up with restify. The author claims that it’s just like express but more focus on web service which is exactly what I want.
I’m happy with restify so far until I start working on authorization part. I pick up passport.js as a package of choice and ues Bsic Strategy which implement Basic Auth. Its reputation is great so why not?
I follow guides/tutorial both for restify and express but it does not seem to work. I cannot explain what’s the problem but it just not work. I’ve tried many alternative routing until I get it to work with the following
Make sure you’ve require passport and passport-http first. You can define your strategy on the server.js or in a new file, whatever suit you but I prefer having authentication logic in its own file so I have auth.js and require it in server.js
Here’s my auth.js
I actually wish I could move passport.authenticate to auth.js, export it and just call ‘auth.authenticate’ or something but I cannot and I don’t know why T_T
If anybody can tell me how to do it please do so. (But I don’t have comment section here, hmm..)
As I mentioned in my previous post, I’m learning to write a Node.js web application using MEAN stack now.
Whereas it seems like MEAN.js provides all we want in single package, I prefer to learn a framework one by one. Also, from GitHub repository, if I want to use MEAN I’ll need to use bower and grunt which I’m not familiar with. So, I’ll just start with a simple Express.
Express can be installed using
$ npm install express --save
the –save command means that we want to add express to dependency list in package.json. There also is a express-generator which act like a scaffolding/skeleton helper to make it easier to create an app structure. You can follow the guide here.
From what I see, express is pretty simple and minimal, the only thing that I feel like I need to think is how should we route incoming requests. The site provide us several ways of doing that. Though, sometimes it means more problems to have many options. However, since my app is pretty simple (about 5 pages), I’ll go with the simplest one. In the future, I might try the Namespace routing
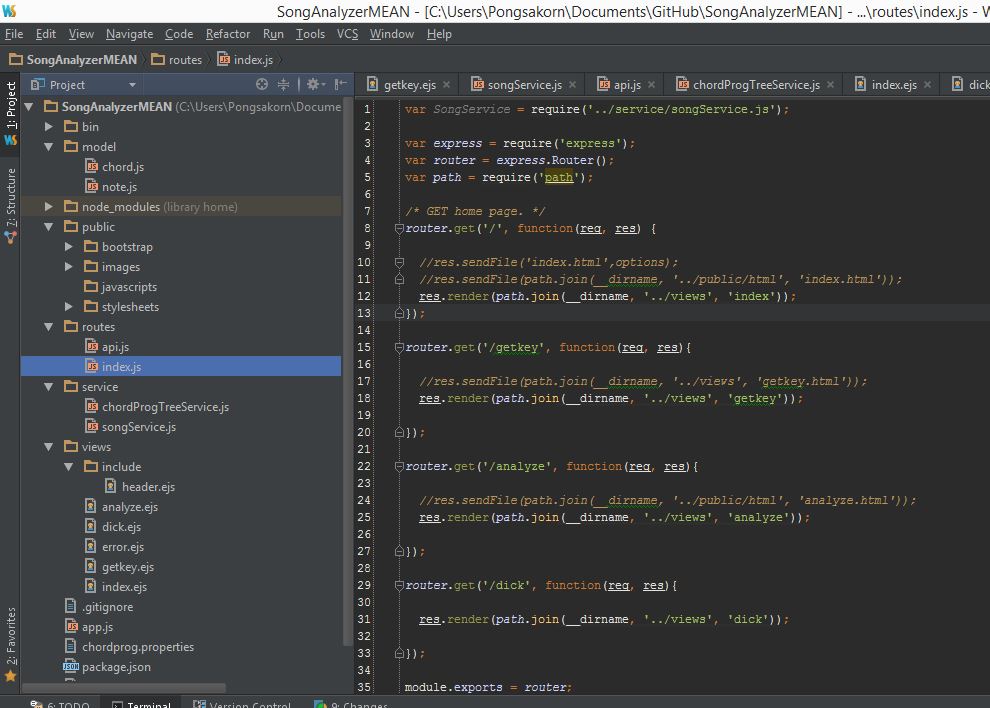
Here’s how my directories looks like now.
Admittedly, this is not the best structure. Later I might consider creating a new directory and put views, model, service directories there but I’ll just leave them like this for now.
You can see the demo here. It’s not working yet, still need to implement Angular.js. and since Angular is on the edge of change, I’m considering waiting for Angular 2.0.
Next thing I want to have a look is Mongoose. Perhaps I’ll use it to store chord progressions for dictionary page.
Lately I’ve been busy with learning Node.js and javascript stuff. So I think it might be a good idea to share the progress of my learning.
I’ve been working with Java as a Web App developer since I graduated. So, when I step into Node.js world I tend to follow the same old project structure of Java. I first tried to search for an MVC framework which I end up with locomotive which is based on Express.
I like to learn by experience so I create a website called SongAnalyzer for this project. The web site is really simple. It has only 2 features. The first one is Keyfinder. The site will take chords as input and try to analyze it and return the most compatible key of those chords. The second one is Analyze Chord Progression. It also takes chords as input but this time it will try to analyze the chord progression and see if it’s one of the common chord progressions or not.
In order to analyze chord progression, we have to know the key first which we can retrieve by using our own keyfinder. The second thing to decide is how should we store common chord progression data. Since I’m very new to Node.js and never had an experience with MongoDB/Mongoose, I choose to store chord progression in a properties file using this module.
Once the program read the properties file, it will create a tree and keep that tree in memory. Then we do travese and split chords in to progression..
Now that I gain some knowledge and basic stuff of Node.js. Next thing I wanna do is to improve this site. However, while I was working on locomotive, I somehow felt that this is not the way Node.js is supposed to be used. Node.js should not be used as a Servlet and render html. Instead, it should be used as web service that contain many services and expose those little services to frontend. If we’re going to make website using Node.js, it’s supposed to be full AJAX. Again, this is purely my opinion and I might be wrong. The concept of full AJAX seems to go well with MEAN.JS. This stack encourages me to decide that the next thing I gonna do is to ditch this locomotive and simply use Express + Angular instead!
Things I hate about Node.js so far
Asynchronous.
Asynchronous is good but there’re times that I wish there is another option. Some Node.js core such as readFile give us an option to choose asyn/syn but third-party sometimes does not provide such option.